Hello coders, do you usually finding some Laravel’s libraries inside packagist? For example do you want to export your data into Excel format, you can search it inside packagist and will found this amazing package that you can use.
Amazingly we can build our own Laravel package / library and publish it to github or even packagist so your package is discoverable to others. I’ll cover this into several chapters, and in this first chapter we will create our simple Laravel package.
We will build a simple currency formatter package. The package will format a number into formatted number with given currency. That’s seems a long way to build it, so in this chapter I’ll cover basic functionality of service provider, route, controller, and view to build a package.
Install Laravel
In this series we will use Laravel 5.5 to develop package so make sure your server requirement is satisfied.
Just follow installation instruction then we will good to go.
Create Package Directory
We know that our installed packages is living inside vendor directory and that is ignored by default. Also we are not supposed to modify code directly from vendor directory.
So lets create folder from laravel root directory with this structure:
app/packages/vendor_name/package_name/src
Now our folder may look like this:

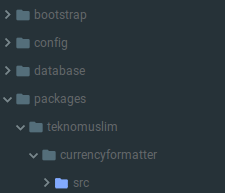
packages: Folder for placing our package’s vendors.
teknomuslim: vendor namecurrencyformatter: package namesrc: Folder for placing our package’s codes.
As you can see, you may change the folder’s name based on your need.
Composer Initiation
We need to initiate our package using composer so your package is able to installed in your Laravel as a vendor later. Don’t worry composer has ability to generate composer.json file with built in command.
Using terminal, navigate to our package name folder, in this chapter is packages/teknomuslim/currencyformatter, and run following command:
composer init
Follow composer instructions, if you don’t know how to answer just press enter to use default answer. You may change it later directly to your generated composer.json.
Now, we have our composer.json
{
    "name": "teknomuslim/currency-formatter",
    "description": "simple currency number formatter",
    "authors": [
        {
            "name": "Didik Tri Susanto",
            "email": "[email protected]"
        }
    ],
    "minimum-stability": "dev",
    "require": {}
}
Excellent, now we’re ready to code!
Define Service Provider
Before defining service provider, we need to load our package. Our package is implement PSR-4 autoloader, so we have to define our package namespace inside laravel’s composer.json
Inside autoload section, setup psr-4 for our package.
"autoload": {
    "classmap": [
        "database/seeds",
        "database/factories"
    ],
    "psr-4": {
        "App\\": "app/",
        "Teknomuslim\\CurrencyFormatter\\": "packages/teknomuslim/currencyformatter/src"
    }
},
Then we have to autoload our package using composer command as following:
composer dump-autoload
Great, our package is already autoloaded inside Laravel. Let’s make a Service Provider for our package. Simply create a CurrencyFormatterServiceProvider.php class inside src folder. Don’t forget to use namespace based on vendor that we’ve created before.
<?php

namespace Teknomuslim\CurrencyFormatter;

use Illuminate\Support\ServiceProvider;

class CurrencyFormatterServiceProvider extends ServiceProvider
{
    /**
     * Bootstrap the application services.
     *
     * @return void
     */
    public function boot()
    {

    }

    /**
     * Register the application services.
     *
     * @return void
     */
    public function register()
    {

    }
}
Yes that is an empty service provider. We will code that later to add more functionality. boot() method is used to boot package functionality like routes, event listeners, or other functionalities. register() method is used to bind any classes or functionality into app container.
Next, we need to add package service provider to config/app.php inside providers array.
/*
 * Package Service Providers...
 */
Teknomuslim\CurrencyFormatter\CurrencyFormatterServiceProvider::class,
Define Route, Controllers, & Views
Yay, we have a package now! Unfortunately, we have no functionalities yet. Ok, let’s start create a routes.php inside our package so we can access it using our browser.
<?php
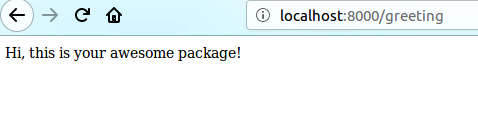
Route::get('greeting', function () {
return 'Hi, this is your awesome package!';
});
Then we have to load our route into boot() method in service provider we’ve created before.
public function boot()
{
    $this->loadRoutesFrom(__DIR__.'/routes.php');
}
Now, run your laravel using
php artisan serve
and navigate your browser to http://localhost:8000/greeting. You should see “Hi, this is your awesome package!” as an output.

IMHO, Placing our code directly into route file is not a best practice. Since we want to modular and separating concern, we could create controller file to do logic for our functionality.
Simply create a controller file inside src folder, or we can create Controllers folder then place controller files into it. Now we’ll create CurrencyFormatterController.php then create a greeting() function to display output as we wrote before.
<?php

namespace Teknomuslim\CurrencyFormatter\Controllers;

use App\Http\Controllers\Controller;

class CurrencyFormatterController extends Controller
{
    /**
     * @return \Illuminate\Contracts\View\Factory|\Illuminate\View\View
     */
    public function greeting()
    {
        return 'Hi, this is your awesome package!';
    }
}
Next, register our controller into package service provider.
/**
 * Register the application services.
 *
 * @return void
 */
public function register()
{
    $this->app->make('Teknomuslim\CurrencyFormatter\Controllers\CurrencyFormatterController');
}
Modify our route to use controller instead closure function.
Route::get('greeting', 'Teknomuslim\CurrencyFormatter\Controllers\CurrencyFormatterController@greeting');
Navigate to your browser once again, and we should see same output as before.
How about view? Can we use blade template instead of returning a string? Yes, a package is able to load views. To do that let’s create a views folder inside src folder then load into boot() method.
/**
 * Bootstrap the application services.
 *
 * @return void
 */
public function boot()
{
    $this->loadRoutesFrom(__DIR__.'/routes.php');
    $this->loadViewsFrom(__DIR__.'/views', 'CurrencyFormatter');
}
Second argument inside loadViewsFrom() method is a namespace for your view. This is necessary since we need to differentiate views from other packages.
Next, Create greeting.blade.php file to remake our greeting output. Now try to use different greeting sentence.
<!DOCTYPE html>
<html>
<head>
    <title>Teknomuslim</title>
</head>
<body>
<h1 style="text-align:center">
    <span style="font-weight:normal">This is currency formatter package</span>
</h1>
</body>
</html>
Almost done, now call view in greeting() method inside controller.
/**
 * @return \Illuminate\Contracts\View\Factory|\Illuminate\View\View
 */
public function greeting()
{
    return view('CurrencyFormatter::greeting');
}
Navigate to browser, and refresh.


Show Your Awesome Package!
We’ve already built our own package. Now show our awesome work into github so other programmer could learn or use our package to their needs. There are several good reasons why we need to learn from other people code.
Just push src folder to github repository. Don’t forget to create .gitignore because we don’t want to commit a common file / folder such as .idea /vendor, etc.
Here is my laravel package progress for this series.
Summary
So we’ve built simple laravel package and also learning how to use route, controller, and view in our package. In the next series, we’ll cover more functionality and also publish it into packagist.
Thanks for reading, I hope this series helps you to discover another awesome part of Laravel framework.